Having just finished our first harvest of oyster mushrooms from a kit, we wanted to try growing our own mushroom spawn from a tissue culture. And we wanted to first give it a try using materials already on hand, and get our cultures from the oyster mushrooms we had just grown. There are definitely more refined methods of accomplishing this (buying agar agar, buying mushroom spawn, petri dishes, using a pressure cooker, etc). But, again, for our first attempt we were stubbornly going to use what we had on hand before upgrading to more established cultivation methods.
We had watched several YouTube mushroom cultivation videos, including one uploaded by a user name “thirdy’s world”. He is from the Philippines and his family grows oyster mushrooms as a livelihood, using rice water and gelatin to grow mushroom spawn. If they can commercially grow mushrooms using this method, maybe we could too? After a little more research on the high nutrient value of rice water we figured their method made sense, and decided to try it for our first mushroom spawn experiment.
Materials for making the agar
- Hydrogen peroxide (to remove chlorine from tap water)
- 2 cups water
- 1 cup white rice
- 2 – .25 oz (7g) packets of unflavored gelatin (for a total of .5 ounces)
- 2 tsp sugar
Supplies for creating the spawn
- 2 ounces or more of whole oyster mushrooms (stem diameter of 1/4″ or more works best)
- Sharp paring knife
- 90% Rubbing Alcohol
- Cottonballs
- Paper towels
- Rubberbands
- Micropore tape (optional, we just happened to have some already)
- 5 small glass jars (we used 2 jelly mason jars and 3 bouillon jars with a pre-drilled 1/4″ hole in the plastic lid)
- Large stock pot
- Trivets, metal pie plates, or anything else that will raise up jars by 2 inches inside stock pot
- Aluminum foil
Prepare the jars – boil the jars and lids in stock pot for 15 minutes and let cool
Agar and jar prep
- Add 1/2 tsp of hydrogen peroxide to 2 cups of water and stir. The hydrogen peroxide removes chlorine and other salts/metals from tap water.
- Add the 2 cups of water and 1 cup rice to a bowl, let soak for 30 minutes, stirring occasionally.
- Drain the rice and save the cloudy white rice water.
- Pour the rice water in a small sauce pan and boil on med-high until it is reduced to 1 cup.
- While the rice water is still boiling, add 2 packets gelatin and 2 tsp sugar, mix well then reduce heat.
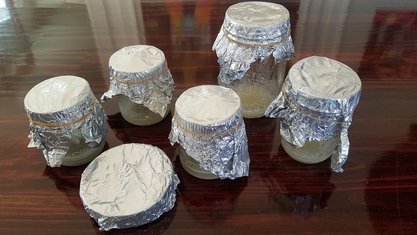
- Pour approximately 1/2″ inch of the agar mixture into each of your jars and replace lids.
- For bouillon jars with plastic lids with drilled hole, seal the hole with a cottonball (allows air/restricts contaminants)
- For jelly jars, lightly screw on lids and bands
- Cover each jar with aluminum foil and secure the foil using rubberbands (to keep moisture out during steaming)
Mushroom Rice Agar
- Place something in the bottom of your stock pot which will be used to raise the jars up about 2 inches from the bottom (metal trivets, pie plate, etc)
- Set the jars into the stock pot, add 2 inches of water (the water should just touch the bottom of the jars) and boil on med-high so that the jars are in a steam bath for 45 minutes to 3 hours (depending on your patience)
- After steaming, remove the jars and allow to cool for 1 hour, or until agar is set.
Taking the tissue culture
Agar with oyster mushroom culture
Once your agar has set, you can begin taking cultures. The goal here is to try as much as possible to keep everything sterile. Wipe down everything that you will be touching with cottonballs soaked in rubbing alcohol; your hands, the working surface/countertop, your paring knife, the rubberband bag, etc and allow to dry before using. You want to avoid transferring any contaminants onto your supplies. Contaminants compete against your growing mushroom culture for space/nutrients and almost always win.
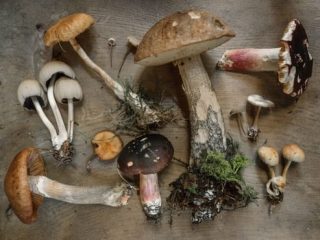
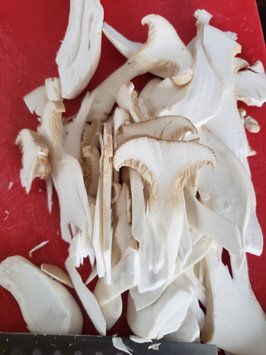
When selecting a mushroom to culture, you will want one that is very fresh and not showing signs of moisture, bruising, cap tears, or separated veils (thin material under cap that conceals the gills). In the image below, the veil of the portabella on the left is till attached.
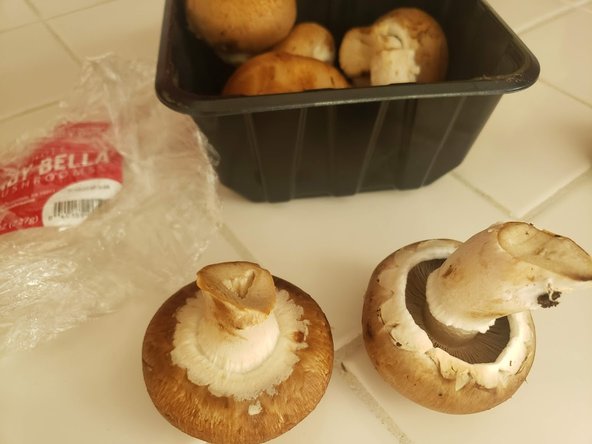
Mushroom Culture Veil
Take a mushroom and tear the stem in half (beginning at the cap). Using your paring knife, cut a small section of tissue from the inside of the stem. Working with one jar at a time, remove the lid and drop one or two tissue cultures onto the agar.
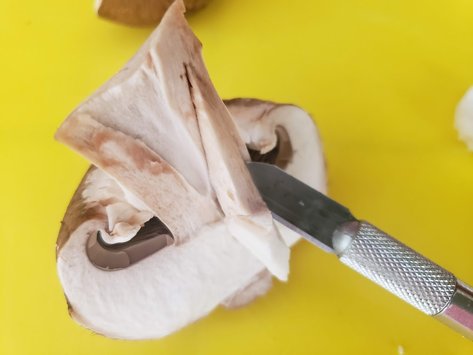
Mushroom Culture
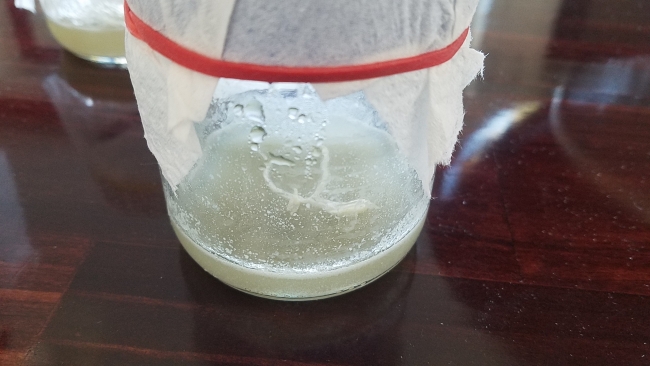
For the glass bouillon jars with plastic lids and cottonball, replace the lid, wrap a strip of micropore tape around the base of the lid (optional), cover the entire lid with a piece of paper towel and secure the paper towel with a rubberband.
For the jelly jars, substitute two pieces of paper towel for the metal lid insert and secure the paper towels in place by screwing on the metal band; then cover with a paper towel and secure with a rubberband. The reasoning for this is that some air exchange is needed (although not much), but contaminants need to be kept out.
Repeat these steps for each remaining jar. Then set the jars on a counter in a room with temperatures around 60-75 degrees and normal air circulation.
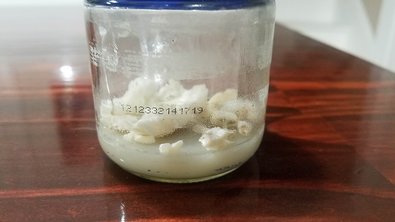
For oyster mushrooms, you should start seeing some signs of white mycelium growth (or mushroom spawn – the mushroom culture’s root system) in about 3 to 7 days.
Mushroom Culture Enoki Stem
Once the entire surface of the agar in the jars is covered in white mycelium, it is ready to be used to inoculate a growing medium such as straw. You can refrigerate the jars for up to 10 days or more if you want to wait before inoculating a substrate.
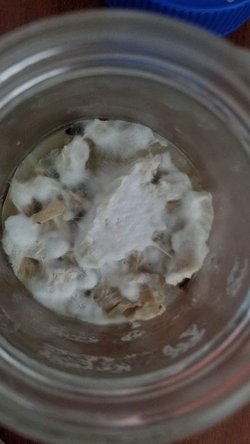
Mushroom Culture Mycelium
Final Note
While we were preparing our first attempt at spawning oyster mushrooms, we also decided to experiment and try a few different methods and growing mediums. Along with tissue cultures, mushroom stem butts were used for spawning onto brown rice, quinoa, inside 2 liter bottles, on a roll of toilet paper, and shredded cardboard. But more on that in another post. The remainder of the mushroom caps and stems were used for dinner. 🙂
Mushroom Dinner