Cornices are a really nice way to scale up your window dressing and give a room a tailored feel. A cornice is made by creating a box-like structure that is dressed with fabric and trim. To make a dollhouse window cornice, the only supplies you’ll need is cardstock, fabric, and adhesive spray. If you want to make trim and tassels, you’ll need coordinating embroidery floss.
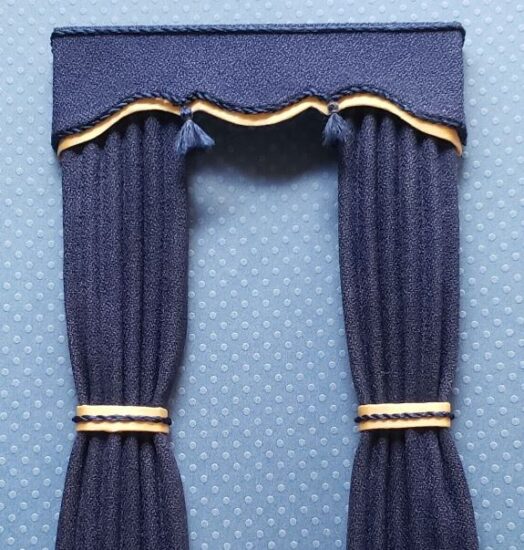
You can pair a cornice with shades, sheers, drapes, swags, and jabots (tails) to create virtually any look. Embellishments such as trim, tassels, ribbon, and tie backs also add a nice finishing touch. Most importantly, making your own cornices allows you to use fabrics that complement the color scheme of a room.
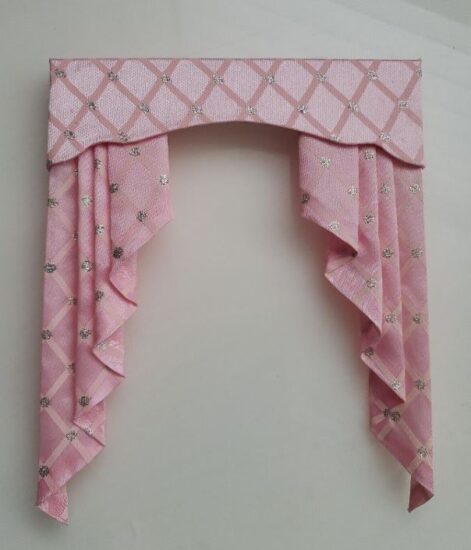
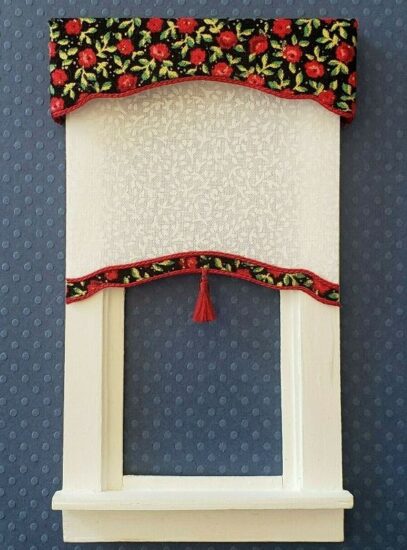
Dollhouse Miniature Diy Cornice With Jabot
Select A Cornice Style
The most difficult part of making a cornice is deciding on the style you would like to use. This image from Bestwindowtreatments.com shows 30 different cornice styles that will hopefully provide some inspiration regarding design.
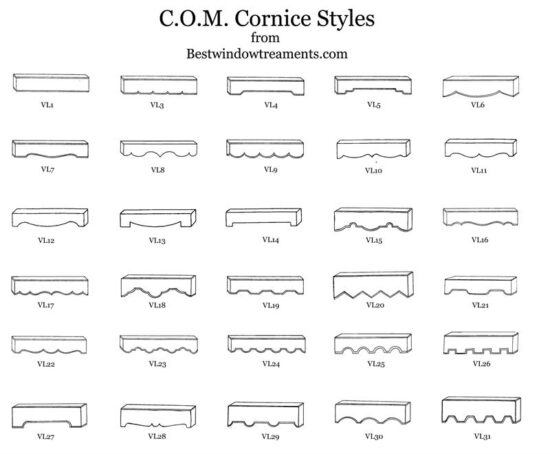
Dollhouse Miniature Diy Cornice Options
When selecting a cornice style, avoid a design that has too many intricate angles. It can be difficult to get fabric to conform to a 1:12 inch scale.
What size should you make your cornice?
Once you have selected a cornice style, you will need to decide how wide to make your cornice. You will need to know the width of your cornice in order to make your cornice template.
The average single dollhouse window is approximately 3 to 3 1/2 inches wide by 5 to 5 1/2 inches tall, including the window casing. Window casing is typically 1/8 of inch in depth. A cornice sits at the top of a window and extends over the window casing or trim.
Your cornice should be approximately 1/4 inch wider than your window and casing, and 1/8 of an inch deeper to allow room for shades or drapes. If you are adding drapery panels or tails, you should add an extra 1/2″ to 3/4″ to the cornice width. A dollhouse cornice for a window that will also have drapery panels on either side should be 4 1/2 inches wide.
Depending on the cornice style, most dollhouse cornices are about 1 inch high and sit over the top of the window by about 3/4 of an inch.
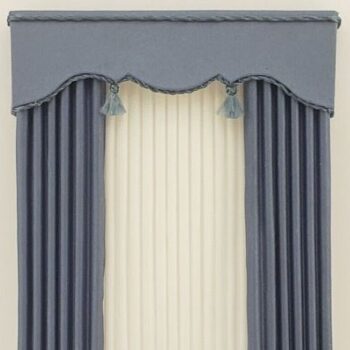
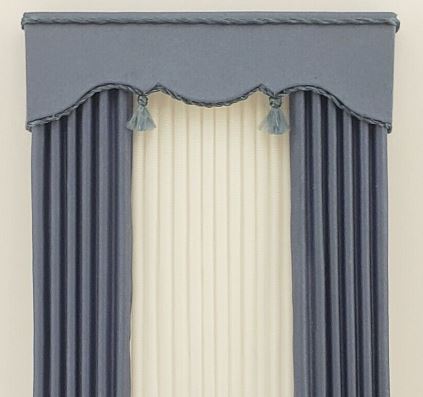
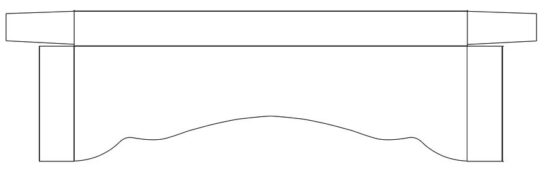
For a cornice that will be used alone or with a shade (like the image below), a 3 1/4 to 3 1/2 inch wide cornice is fine. If your dollhouse window treatment also includes drapery panels or jabots, a 4 1/2 inch cornice is needed.
Dollhouse Miniature Diy Cornice With Shade
Creating Your Dollhouse Cornice Template
To make your cornice, you will first need to create the cornice structure. Your cornice will have a front, a top, and two sides.
Create the front of your cornice template
On a piece of cardstock, draw a rectangle that is the width and height you need for your cornice (i.e. 4 inches wide by 1 inch tall). Draw your cornice design near the bottom of the rectangle.

Dollhouse Miniature Diy Cornice Front
Add the top and sides to your cornice template
Now you’ll add the top and sides to your rectangle. They are usually 1/4″ inch wide (the distance from the wall, needed to sit over casing and accommodate drapery). In the picture below, we’ve also added tabs to the top portion of the cornice that can be glued to the sides for stability.
Dollhouse Miniature Diy Cornice Sides and Top with Tabs
You can now cut out your cornice template and score the folds. If you are making more than one cornice, you can use this template to trace.
A single piece of heavy weight cardstock (80 lbs+) provides enough structure for a fabric-covered cornice. If the structure feels too flimsy, consider cutting two templates and gluing them together.
Add your fabric to the cornice
Cut a piece of fabric so that it’s 1 inch wider and taller than your cornice template. Spray the back of the fabric with adhesive spray and lay the cardboard template onto the fabric.
You can now trim your fabric however you’d like, using the cardboard as a guide. I prefer the leave 1/4″ inch of fabric so that the fabric can be folded over to the back of the cardboard, for cleaner edges. This involves a lot of strategic cuts and darts, especially around curves.
Once all the fabric has been trimmed and folded, you can glue the top of your cornices to the sides. Here is a view from the top of a cornice after the top has been tucked behind the sides and glued:
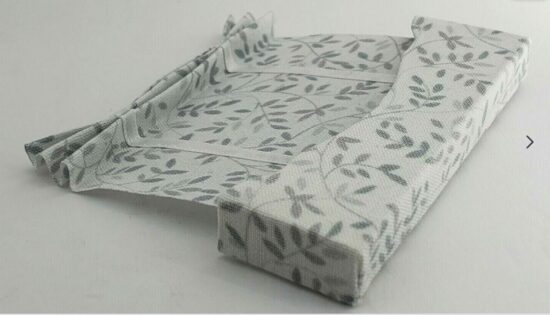
Dollhouse Miniature Diy Cornice Top and Side View