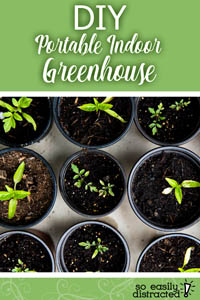
If you are starting seeds before the spring or wanting to protect plants over the winter and don’t have a greenhouse, a portable indoor greenhouse is a great alternative.
Buy Or DIY?
In terms of price, the main comparison is the lower cost of a pre-made portable greenhouse (without casters) versus the items you would buy for a DIY indoor greenhouse.
Structurally, there is a significant difference between the two. The average shelf weight capacity of the purchased portable greenhouse is 20 to 30 pounds, versus 200+ pounds of per shelf weight capacity of a metal shelving unit. Most of the reviewers for the pre-made greenhouse said they used zip ties to re-enforce shelving. A few mentioned stacking shelves together to increase weight capacity.
Is it really “portable”? If you need to move your portable greenhouse around, standard plastic caster wheels won’t get you very far once you’ve added all your plants. At best, plastic caster wheels might be able to still function under 75 pounds of weight; whereas 3″ metal caster wheels function well with a 300 pound load.
Depending on how many plants you store in your greenhouse, and whether you really need it to be portable, you might not need casters at all. We’ve found that furniture sliders work just fine when we need to scoot our DIY greenhouse to a new indoor spot.
Whether you buy one or make one you’ll still be buying some needed accessory items such as grow lights, drip pans, temperature/hygrometer, and mini fans, depending on your needs (more on that below, including tips)
Pre-Made Portable Greenhouses
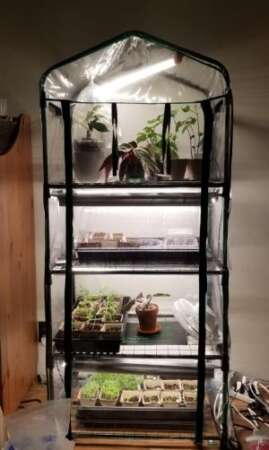
Indoor Portable Greenhouse
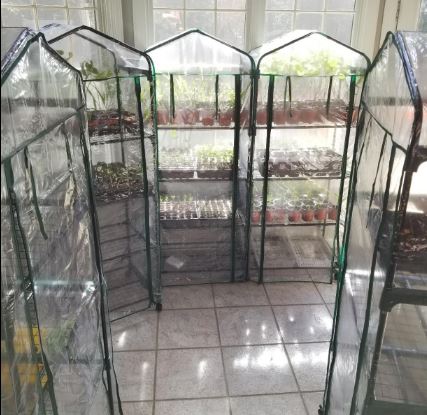
Indoor Portable Greenhouse 5
You might buy a pre-made indoor greenhouse if you just need something quick. There are pre-made indoor greenhouses that you can buy, and they aren’t all that expensive. They include a frame, shelving, a zippered cover, and casters (optional)
Here are two indoor greenhouses available on Amazon with pretty good reviews:
The benefits to buying an indoor greenhouse versus a DIY solution include:
Pros:
- Both the greenhouse structure and a fitted cover are included.
- Can be less expensive than a DIY version if buying without casters.
- The greenhouse is lightweight (when no plants are inside).
- It can be used indoors and outside (if properly secured).
- If you don’t need shelves spaced further than 12 inches apart.
- Can hold up to 80 pounds of plants (as long as you don’t move it around).
- Casters make moving it around easier (flat surface, no plants).
Cons:
- The shelves can hold up to 20 lbs each but perform best (don’t sag or bow away from frame) with around only 10 pounds of plants on each.
- If the zippered cover is used a lot, it has a tendency to tear and you will need to purchase a new cover.
- The metal tubes for the frame can bend or crack under pressure.
- The shelves can’t be adjusted higher or lower.
- The plastic casters don’t roll well under a lot of weight and must be on a level surface.
DIY Portable Indoor Greenhouse
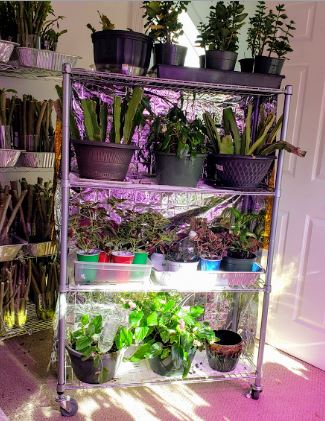
Reflective mylar on the back of this makeshift indoor greenhouse reflects both sunlight from the window as well as grow the lights. Even the bottom shelf is sunny.
You can make your own even-sturdier portable greenhouse just by using a metal wire shelving unit and a plastic 4 mil drop cloth. We bring a lot of plants indoors just before the first frost, and we start a lot of seedlings indoors a month before planting season begins. Metal wire shelving units make the ideal indoor greenhouse.
The reason we prefer to use wire shelving units is because they are very sturdy, the 3″ or 4″ casters make them so easy to move around, the shelves can be adjusted as needed, and the biggest benefit is that we use them as regular shelves for storage when they’re not being used as greenhouses. The shelves with 1 inch diameter poles are the sturdiest.
The cheapest 4 shelf unit we’ve found so far (that come with heavy duty casters) are at Amazon. They sometimes have returned units, which can be as much as $15 cheaper than new. Home Depot used to have great sales on shelves, but not as much recently.
We always buy the 57″ tall shelves because the height is perfect for windows, and also because we can make two shorter shelves (AKA plant stands) from the single taller shelf unit. Each unit comes with both self-leveling feet and casters, which is perfect when making the unit into two smaller units.
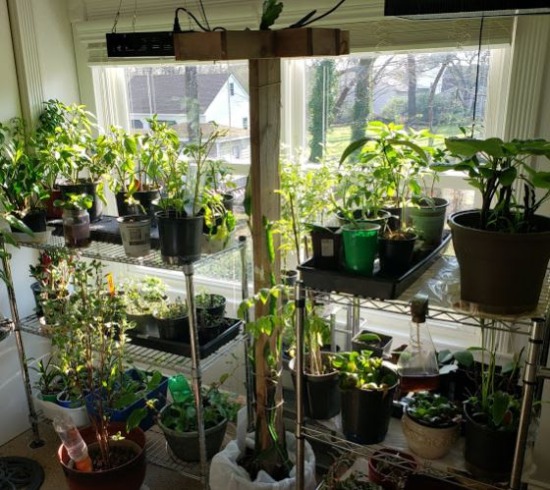
Half shelves used for plants near the window and under the grow lights.
For seedlings and plants that need higher humidity like cuttings that need 70% humidity for ~10 days, we tape on inexpensive plastic drop cloths (available for 1.99 at Harbor Freight, 1.00 at dollar store) to the back and sides. For the front of the shelves, a section of the plastic drop cloth is cut so that it covers the top and front of the shelving. It’s rolled when we need access to plants or if it gets too humid.
For all other plants, we tape on light reflective mylar sheets to the back and sides of the shelves that reflect both the light from a window and two plant grow lights. The reflective sheets are actually just those inexpensive emergency mylar blankets, which you can pick up from the dollar store. But they work great at reflecting light and heat, as well as minimizing drafts.
And now for some pros and cons of our DIY greenhouse:
Pros:
- The unit can hold up to 1400 pounds (with leveling feet) or 350 pounds (with casters).
- The heavy duty casters work on level surfaces and carpet (can get a bit bumpy on tiles).
- The shelves are extremely sturdy and don’t bow when loaded up with plants.
- The shelves can be adjusted/moved to almost any height (although that takes a bit of elbow grease).
- The units can be used for household storage when not needed for plants.
- The 1 inch diameter poles are sturdy regardless of how many plants are on the shelves.
- The price for shelves with casters is comparable or better the price for pre-made greenhouses with casters.
Cons:
- The shelving units shouldn’t be used outside where they might subjected to rain, etc.
- You have to make your own cover using a plastic drop cloth (available for 1.99 at Harbor Freight, 1.00 at dollar store). You can buy clear shelving covers, but those start at $100.
Some Tips For Both Pre-Made And DIY Indoor Greenhouses
Drip Pans
Drip pans, just in case our Angel Trumpet cuttings fall over.
Indoor greenhouses don’t come with drip pans to catch water or falling plant debris. You could buy plant saucers for each plant in the greenhouse, but that won’t work for seedling trays. A quick, inexpensive solution is to use clear storage containers or just pick up a bunch of aluminum buffet trays from your local dollar store. Some reviewers mentioned buying crate replacement pans and placing them underneath the shelving unit.
Light Reflection
Indoor greenhouse shelves don’t necessary allow grow plant lights or window sunlight reach to the bottom shelves. By taping on light-reflective mylar sheets to the back and sides of the shelves, light will reflect both the light from a window and plant grow lights. The reflective sheets are actually just those inexpensive emergency mylar blankets, which you can pick up from the dollar store. They work great at reflecting light and heat, as well as minimizing drafts.
Monitoring Temperature And Humidity
For plants that have very specific requirements of temperature and humidity, new cuttings, or if you just want an easy way to monitor both without having to peek through each of the greenhouse covers all the time, a set of sensors is a convenient accessory to monitor all your indoor greenhouses from afar. You can place a sensor in each greenhouse and keep the main monitor where it is easy to read.
Air Circulation
A greenhouse cover is great for containing humidity for plants, but stagnant air can lead to bacteria or fungus growth. Opening the cover for a few hours a day helps, but it’s just one more thing you have to remember to do each day. Plus, air flow is great for training seedlings to grow stronger stems. Just add a small fan on the bottom shelf (facing upward), and you’ll have all the air circulation you need.
Misting
In our region, the outdoor humidity stays crazy high during the growing season (70-80%). But in the winter when we bring our plants indoors, the average humidity inside ranges from 40-50%. That’s not terrible, but the plants grow better and appear healthier when the humidity is increased. We mist the plants in our indoor greenhouse shelves almost daily.
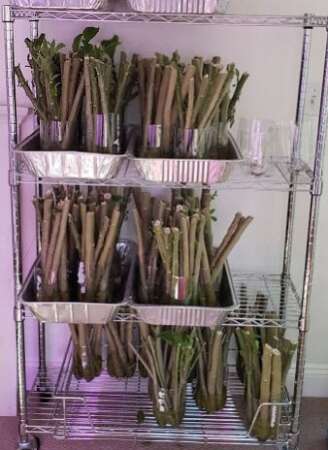
But we usually have at least one shelving unit just for cuttings that were made just before the first frost that will be rooted up for the next season. For those cuttings, a consistent 70% humidity is necessary for at least 2 weeks. For those, we bought an inexpensive humidifier and put it on a timer so that it runs every other hour for 12 hours a day.
The 500 ml capacity is usually enough for 2 days, plus the unit shuts off automatically if it runs out of water.
Watering
We have a lot of plants. ..way too many to make sure that each and every plant is getting the right amount of water. Except for cuttings that are rooting in water, almost all of our other plants are watered automatically using either a modified capillary mat system (fancy way of saying foam covered in felt fabric), or through ceramic or terra cotta watering stakes.
You can read more about those in the following articles:
Alternative Methods For Watering Houseplants Comparison
Plant Watering Stakes And Watering Globes Review
Last, But Not Least…Grow Lights
Having an indoor greenhouse near a window is great, but especially in the winter, there will never be enough daylight length to stimulate the type of growth most plants need. Plus, sunlight that passes through glass will never have the same intensity as outdoor sun (at least 50% less). This is fine for plants that prefer shade to partial shade. But for growing seeds indoors, or plants that prefer full sun, the diffused/filtered/reflected rays of the sun through a window just aren’t enough to encourage growth at the same rate as outdoor sunlight.
UV light has been shown to speed up plant growth and photosynthesis. The very first thing you will notice when using a plant grow light is that your plants become greener within a matter of days, flowering plants will produce more blooms, and you’ll notice that your seedlings don’t get quite so “leggy”.
We went with 600 watt grow lights that have both “grow” and “bloom” options. But to be honest, the plants just seem to do so much better when we turn on both “grow” and “bloom”, so that’s pretty much what the lights are always set at. What’s nice about these is if you have more than one hanging within 3 feet of the other, the plugs can be piggybacked together so you’ll only need one receptacle outlet to plug them in.