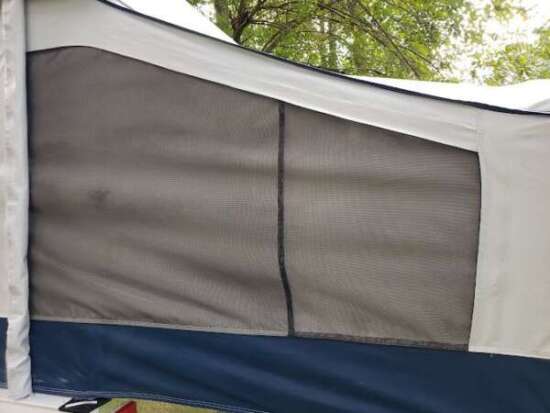
Here’s another project we completed on our pop-up camper repair/remodel. We had temporarily used tape to hold the torn screen sections; but it wasn’t attractive and was definitely not the look we were going for.
Repairing Camper Screens Old
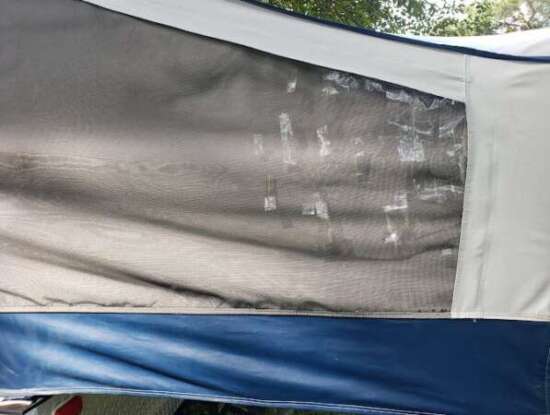
After thoroughly cleaning the canvas, we found that this section of screen (that sat under the damaged roof when closed) was dry-rotted and continued to tear with the least little pressure. The other half was still in great shape. So we decided just to replace the dry-rotted area and seam it so that it looked as much like the original as possible.
We could have avoided a center seam altogether if we had just replace that entire section of screen, but we’re happy with the results and the seam almost looks like it was meant to be there.
These instructions should work for you even if you decide to replace the entire screen rather than just a portion of it.
Supplies needed:
There are links to the supplies on Amazon if you want to get an idea of what you’ll need. You can probably pick up a few of these items at your local dollar store.
- Fiberglass mesh screen (enough to extend 3″ beyond opening)
- Monofilament fishing line
- Upholstery sewing needles (one long and one curved)
- Long sewing or quilting pins (1.5″ is okay, 2″ is better)
- 6 craft spring clamps
Step by step directions:
Detailed instructions along with photos are provided further below.
- Before you begin, fully extend your camper and make sure the canvas is tightly wrapped around the bunk ends.
- Lay a piece of fiberglass mesh screen over the area to be repaired, overlapping by at least 3 inches. clamp to top and bottom of canvas.
- Create a seam (hem) on the screen-side of the repair by folding it onto itself by 1/2″ and pin.
- Use this new seam as a guide to cut away the damaged section of fiberglass.
- Pin the new seam onto the original fiberglass and double-stitch into place using upholstery need and fishing line.
- Stitch the bottom of the new screen onto the canvas.
- Move to the inside of the camper. Pull the top and canvas-side of the new screen inside and pin into position.
- First stitch the top of the screen into place, then sew the canvas-side of the screen into position.
- At this point it is safe to trim off any excess screen.
Make sure canvas is taunt
You will need to fully raise your camper top and ensure that the canvas is tightly wrapped around the bunk ends. If there is any slack in the canvas, the repaired section of screen might not be wide enough and could get torn once the canvas is fully extended.
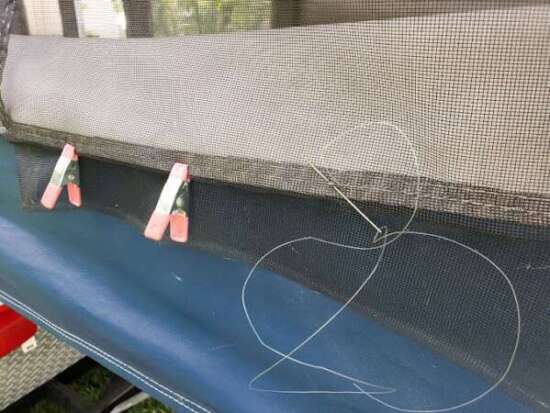
Place replacement screening in position
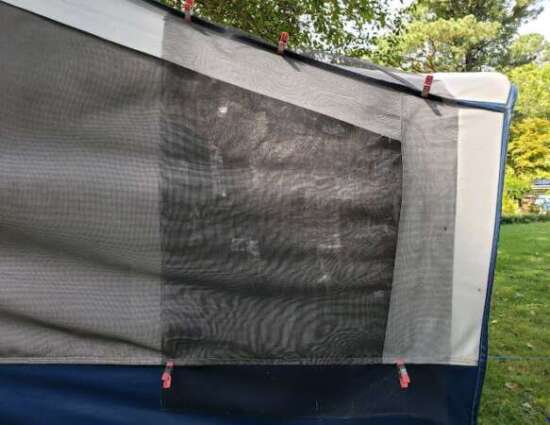
Position your fiberglass mesh screen over the area to be repaired. The screen should overlap the area by at least 3 inches on each side; we overlapped by 5 inches.
Use small craft clamps to hold the screen in place at the top and the bottom of the canvas.
Repairing Camper Screens Fitting
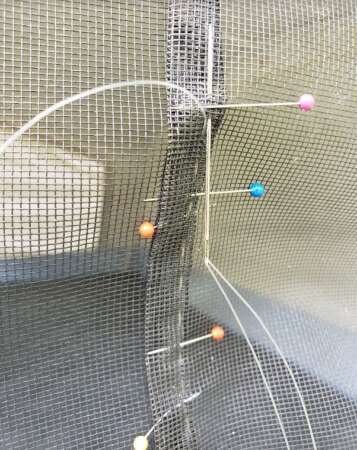
Begin screen-side repair
Begin with the section of the repair that joins the existing screen, the “screen-side”. In order for the new screen to hang flush/properly and have less of a “repaired” look to it, it needs to be the first section that is seamed on. If it isn’t done first, it may end up not sitting flatly on the canvas because of tension from the other sides.
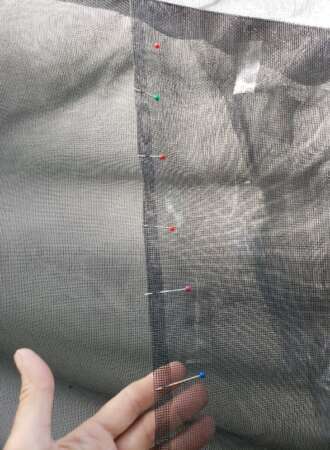
Start by folding the screen-side of the new fiberglass over onto itself by about 1/2 to 5/8 of an inch, and pin the fold. This fold will be the seam that joins with the existing screen. This will also provide you with a visual guide for making your cuts in the next step.
Repairing Camper Screens Seams
Cut away the damaged screen
Next, unclamp the bottom of the replacement screen and flip it up out of your way. Cut away the damaged section of screen. Leave roughly 1/2 to 5/8 inch of screen on the top, bottom, and canvas side.
The screen side should be trimmed so that it overlaps the seam you created in the previous step by 5/8″. See the step below for clarification.
Repairing Camper Screens Cut
Sew the screen-side of the new section of screen
Now that we’ve cut away the damaged screen, we can begin by seaming the screen-side.
Flip the replacement screen back and re-clamp it to the bottom of the canvas.
With the original pins still on the folded seam, pin the old screen and the new screen together. The old screen and the new screen should overlap one another.
Using an upholstery needle and monofilament line, double stitch the screens together.
Repairing Camper Screens Stitch
Sew the bottom of the screen patch onto the canvas
Repairing Camper Screens Bottom
Run a stitch along the bottom of the screen. We did one row of stitching on the front. Then we flipped the screen underneath and did another stitch on the back. Don’t trim the excess yet; wait until all the sides are stitched just in case you need to make adjustments.
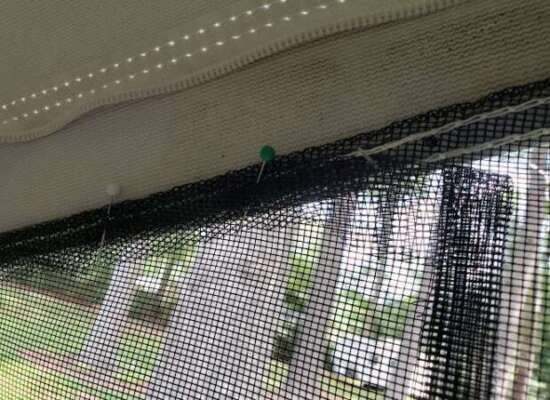
Pin and stitch the remaining sides of the new screen
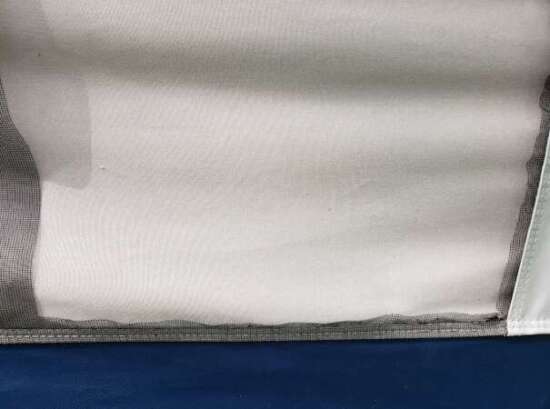
You’ll need to do this portion from the inside of the camper. Pull the top and canvas-side of the new screen inside, fold it down so that it matches the original edge of the screen and pin into position. Repeat this for the canvas-side of the screen.

Repairing Camper Screens Inside
There are two areas that will give you trouble. One is the top of the screen side seam (you can see it on the right side of the picture below), and the bottom corner of the canvas-side. These two areas don’t fold neatly inward because they were stitched on the outside. You’ll need to tuck them in so that they look nice.
Repairing Camper Screens Feed
Once everything is pinned into place, sew the top of the screen into position. There may not be a lot of wiggle room for the straight upholstery needle, so you may want to switch to the curved sewing needle.
The most difficult part to stitch is the canvas side. You’ll most likely need the curved upholstery needle for this side. We found it helpful the loosen up the canvas at this point. A small amount of slack made the stitching process easier. As long as it is pinned well, you shouldn’t have to worry about bunching or unevenness.
The final trim
Repairing Camper Screens Canvas
Once all four sides are stitched into place and you’re happy with the results (and don’t need to make any adjustments), you can safely trim off all the excess fiberglass screen.
Finished!