The protective sealant on a rubber roof will degrade over time, and begin to get chalky when cleaned. This is a clear sign that you should apply a coat of rubber roof coating to protect the rubber and extend the life of your camper’s roof.
After applying a the rubber roof coating, your camper’s roof is beautiful and white again. Unfortunately, a lot of prep work has to be performed before you can begin.
- Inspect lap sealant and repair any defects
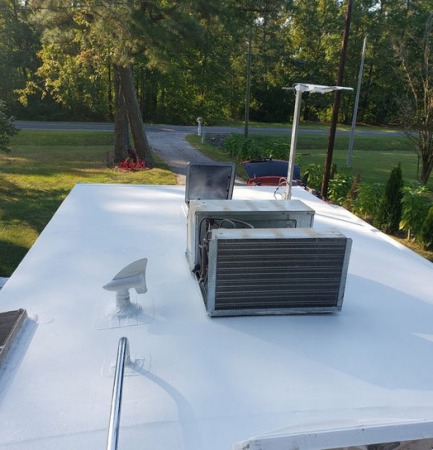
- Remove appliance covers, vent fins, etc
- Tape tarps or plastic sheathing to the sides of the camper to protect them from cleaning solution and rubber roof sealant.
- Clean the roof to remove dirt and other build up
- Use a mini roller and small brush to apply a coat of rubber roof sealant around all fixtures.
- Use a regular paint roller to apply the rubber roof sealant to the top of the camper.
Inspect Lap Sealant
The old lap sealant needs to be checked for cracks or separation. Any defects in the caulk need to be repaired. We opted to replace most of our lap sealant with roof sealant tape from Beech Lane, which we picked up at Amazon for under $35 (here’s the link if interested).
Remove Covers and Fins
Remove pretty much anything that would get in the way when you are painting on the rubber roof coating. If you remove any screws, tape them onto the item to which they belong using masking tape.
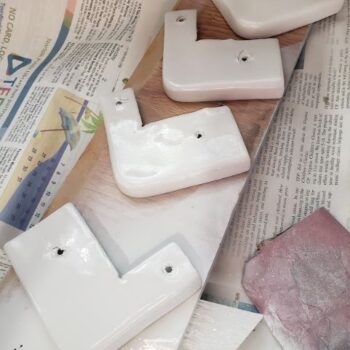
If anything has become discolored due to exposure or age, now is the perfect time to also give them a facelift. We used white appliance spray paint to make the vent fins and AC cover look almost like new.
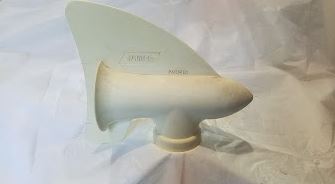
Camper Roof Old Vent
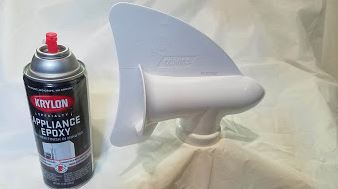
Camper Roof Restored Vent – first coat
Clean The Roof
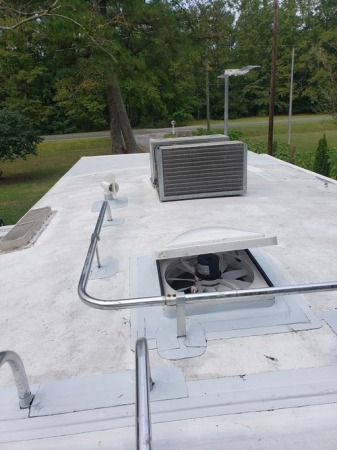
Camper Roof Cleaned
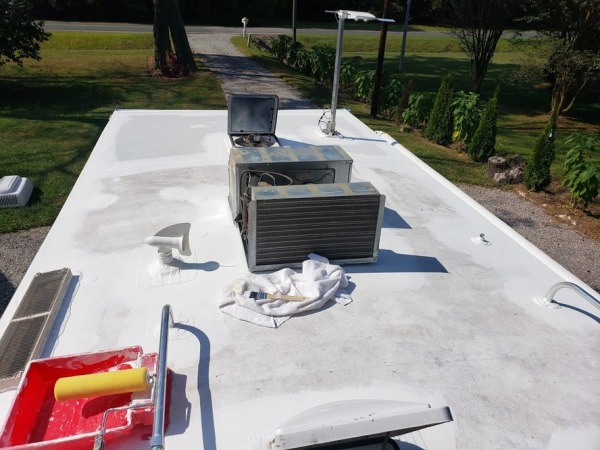
You will also need to do a deep cleaning so that any dirt or organic build up such as algae and pollen is removed. You can by commercial roof cleaners or make a DIY camper roof cleaning solution (DIY Camper Rubber Roof Cleaner Recipe)
We used a leaf blower to first blow off leaves, pine needles, and other loose debris. After we washed the roof, we used a squeegee to remove as much water as possible. We used the leaf blower again; this time to speed up the drying process, especially around fixtures.
Applying The Rubber Roof Coating
This final step is the most rewarding part, because each coat of sealant you apply makes the camper’s roof look almost like new. How many coats you apply really depends on the condition of your roof. If it’s only slightly dull and there are no exposed black rubber sections, one coat might be enough. If the roof became chalky while you were cleaning it, or there the old rubber sealant looks cracked, you will need at least two coats.
We applied 2 coats to the top of our 15 year old camper roof. We had previously done some membrane repair work, and the original rubber sealant was chalky and had exposed rubber as well as significant cracking.
For our 19 foot camper, we only needed a one gallon of rubber roof coating. We purchased our’s through Amazon for around $55. We opted for Heng’s after reading the reviews. (link)
We used a small 4″ paint roller and small brush to trim the edges, around all appliances and any locations that wouldn’t be accessible with a full sized paint roller and short nap.
Rubber Sealant Applied To Camper Roof Trim
Starting at the front of the camper, we used a regular paint roller with an extension handle to apply each coat of rubber roof coating.
You can apply a second coat once the first is dry (4 to 24 hours). Just keep in mind that there’s a difference in time for when paint dries (hours) and when it cures (1+ week). Curing can take up to a week or more.
Rubber Sealant Applied To Camper Roof Finished
Tips
As for tips, here are a few things that we learned:
- Pick a day where no rain is expected for at least 3 days. Depending on the weather (heat and humidity), it may take a full day for the first coat to dry.
- Start painting early in the day, so that the paint is set up enough before any evening dew starts collecting on the surface.
- Work in a location that is out of direct sunlight, or wait til a cloudy day. The paint can get clumpy if full sun is hitting it and you roll over it more than once during application.
- If working outside, pick a day where there will be minimal wind. Otherwise, you’ll find yourself picking debris out of the wet paint.
- Wear socks when you apply the second coat, to avoid getting shoe or footprints on the paint.